Photography 101: Strike a Chord with Better Photos – A Beginner’s Guide
Hey there Shutterbug, just wanted to let you know that some of the links on this site may be Amazon Affiliate or affiliate links,. which means I may earn a small commission if you make a purchase after clicking on them. But don't worry, it won't cost you any extra – in fact, sometimes you may even get a special discount! So if you do decide to buy something through my links, know that you'll be supporting my work and helping me bring more helpful content your way. Thank you for your support, you're like a superhero to my work! I couldn't do it without you, unless I suddenly develop the ability to clone myself...which, honestly, would be pretty cool.
Do you want to take photos that rock like a guitar solo, instead of looking like they were taken by a vegetable? Don’t worry, I’ve got you covered with this beginner’s guide on how to take photos like a pro!
Hey there, fellow music lovers! Today, I’m talking about how to master the basics of photography, specifically composition, exposure, and lighting, so you can take stunning photos that will make all your friends jealous.
Just like in music, these three elements work together to create something beautiful and unique. And just like learning an instrument, mastering the basics of photography is essential for any photographer, whether you’re a seasoned pro or a beginner.
So, let’s dive into the nitty-gritty of photography and cover some of the most important things you need to know. I’ll be talking about:
- Understanding Composition
- Nailing Exposure
- Playing with Light
- Choosing the Right Camera Mode to Jam Out With
- Fine-tuning Your Photos with Post-Processing Magic
- Rocking Ethical and Legal Considerations in Photography
- Geeking Out on Gear and Equipment for Epic Shots
I’ll be breaking down each of these topics with some humorous anecdotes and practical tips to help you level up your photography skills. So grab your camera and let’s get ready to rock!
I. Composition: The Art of Framing
Alright, let’s talk about composition. Think of it like composing a sick beat – you want to arrange the different elements in your picture like you would arrange the different sounds in a song. And just like how a good beat can get people grooving, good composition can make your photos stand out.
One of the most useful tools in your composition arsenal is the rule of thirds. It’s like the bassline in a song – it provides a solid foundation for the rest of the elements to build upon. To use it, just imagine a tic-tac-toe board on your photo and place the important parts where the lines intersect. Trust me, it works like a charm.
But I’m not done yet – let’s talk about leading lines. Just like how a melody can lead you through a song, leading lines can guide your eye through a photo. These can be anything from a winding road to a staircase, and they draw your attention to the subject of your photo.
And then there’s framing – think of it like adding a sick beat drop. By using objects in your photo to frame your subject, you make it stand out even more. Plus, it just looks cool.
Symmetry is another technique that can make your photos pop. It’s like a catchy chorus – it’s satisfying to the eye and just feels right. Try it out and see for yourself.
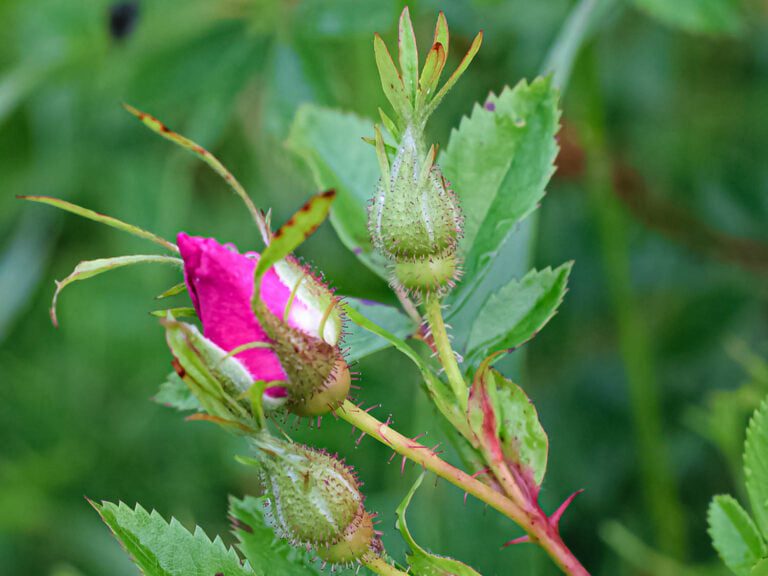
To give you some inspiration, check out these examples of photos that use these composition techniques. See how they just look better than your average snapshot?


But really, the most important thing is to experiment and have fun with it. Just like how there are endless possibilities in music, there are endless possibilities in composition. Try different angles, and perspectives, and don’t be afraid to leave some empty space. Who knows, you might just create a masterpiece.
II. Exposure: The Key to a Perfectly Exposed Photo
Alright, let’s talk about exposure – the rhythm section of photography.
Exposure is all about getting the right amount of light into your camera’s sensor to capture the perfect shot. Just like a good bassline, it provides the foundation for your photo.
To get the perfect exposure, you need to balance three elements: aperture, shutter speed, and ISO. They work together like a well-coordinated band to create a perfectly exposed photo.
The aperture is like the bass player – it controls how much light enters the lens by changing the size of the opening. The smaller the number (like a low bass note), the larger the aperture and the more light enters the camera. This affects the depth of field, which is how much of the photo is in focus.
Shutter speed is like the drummer – it controls how long the camera’s sensor is exposed to light. The longer the shutter is open (like a slow drum beat), the more light enters the camera. This affects motion blur, which can be used to show movement or freeze it in place.
ISO is like the keyboard player – it’s the camera’s sensitivity to light. The higher the number (like a high-pitched keyboard note), the more sensitive the camera is to light. However, a higher ISO can introduce digital noise, which can make your photos look grainy so be careful.
To get the perfect exposure, you need to balance these three elements based on the lighting conditions and the effect you want to achieve. It’s like jamming with your bandmates – you need to find the perfect rhythm to make beautiful music.
Now, let’s have some fun and play with exposure settings to create different effects in your photos. For example, to freeze motion, use a faster shutter speed. It’s like playing a fast beat to get everyone moving. Or if you want to create motion blur, use a slower shutter speed, like playing a slow, groovy rhythm.
You can also adjust your aperture to affect your photo’s depth of field, like changing the bassline to create a different vibe. Or adjust your ISO to get the correct exposure in low-light situations, like adding a keyboard solo to spice up the song.
Experiment with different exposure settings, and just like in music, don’t be afraid to get creative and try new things. After all, some of the best songs (and photos) come from experimenting with new rhythms and beats.


III. Lighting: The Secret Ingredient to Great Photos
Welcome to the third act of our music concert on How to Take Photos! In this act, I’ll be rocking out to the secret ingredient of great photos – lighting!
Just like how a guitar solo can make or break a song, lighting is crucial to capturing stunning photos. Without it, you wouldn’t even be able to see your subject, let alone capture its essence in a photo. So, let’s plug in and learn more about how to use lighting to your advantage.
Lighting, much like the rhythm section of a band, is the foundation that sets the tone for your photos. Good lighting can make your photos look lively and vivid, while bad lighting can make them look dull and lifeless. There are two types of lighting – natural light and artificial light – just like how there are two types of guitarists – acoustic and electric.
Natural light, like an acoustic guitar, can be found outside or near windows and can create a warm and organic tone to your photos. Artificial light, like an electric guitar, includes any man-made light source and can add a cool and edgy vibe to your photos.
Just like how a musician can use different chords to create different moods, you can use lighting to create different effects in your photos. Soft lighting can create a romantic or dreamy mood, while harsh lighting can create a dramatic effect with strong shadows and highlights.
Just like how a musician can use different effects pedals to create different sounds, you can experiment with different lighting techniques to add depth and texture to your photos. Backlighting can create a halo-like effect around your subject, while side lighting can create dramatic shadows and highlights.
Just like how a sound engineer can adjust the volume and EQ to make the music sound perfect, you can adjust your camera’s settings to capture the perfect lighting. Adjusting your camera’s white balance can make your subject look warmer or cooler in tone. Adjusting the flash’s intensity or using a diffuser can create a softer and more natural look.
Understanding lighting is like being a part of a band. You need to work together with your lighting sources to create a harmonious and stunning result. So, let’s raise our lighters and shine some light on our subjects!


IV. Camera Modes: Which One Should You Use?
Welcome to the world of camera modes, where the options are plenty, and the confusion is real! But don’t worry, I’ve got your back. Here’s a rundown of the five main camera modes and how to use them to take your photography game to the next level.
1. Manual Mode
Every setting on your camera is like a knob on a music mixer, each having a unique role in creating the perfect tune, or in this case, a perfect picture. In this section, I’ll be discussing the most advanced knob on the camera, the manual mode, and how to use it to create a symphony of light and colour.
Manual mode is like playing an instrument without sheet music, it gives you complete creative control over your shots. You can adjust the aperture, shutter speed, and ISO to your heart’s content, to get the exact exposure, depth of field, and noise level that you want. It’s perfect for when you want to take a little bit more time to compose your shot, or when you’re shooting in a tricky lighting situation, and you want to get the most out of your camera’s capabilities.
The histogram and exposure meter are like your ears, they tell you if you’re playing too loud or too soft. They give you a visual representation of the brightness levels in your shot, so you can adjust your settings accordingly. Think of the histogram as a music sheet, where each note represents a pixel’s brightness value, and the exposure meter as your conductor, telling you if you’re on the right track.
The focus ring and focus points are like your glasses, they help you see the details clearly. They allow you to adjust the focus of your lens, so you can get the sharpest and clearest shot possible. Think of the focus ring as your fine-tuning tool, and the focus points as your magnifying glass, helping you see the world in more detail.
2. Aperture Priority Mode
Now, let’s talk about Aperture Priority mode. It’s like playing a musical instrument where you control the volume of just one instrument in an orchestra. In this case, the aperture is the instrument, and you get to control the depth of field, which is the distance between the nearest and farthest objects in focus.
For portraits, you want a shallow depth of field to blur the background and make your subject stand out. For landscapes, you want a deeper depth of field to capture more details. And for macro, you want the smallest possible aperture to maximize the depth of field.
But wait, what if your photo turns out too bright or too dark? That’s where the exposure compensation dial comes in. It’s like a volume knob for the whole orchestra. You can turn it up or down to adjust the overall brightness of the photo without changing the aperture value. So if your photo is too bright, you can dial it down a notch, and if it’s too dark, you can dial it up a bit. Easy peasy, right?
3. Shutter Priority Mode
Ah, the drummer of the photography band – the Shutterbug! Shutter Priority Mode is all about giving him control over the tempo. When you use this mode, you get to decide how long or short the shutter stays open. If you want to freeze motion, you need a fast shutter speed like a drummer keeping a fast beat. If you want to capture motion blur, you need a slower shutter speed like a drummer playing a slow ballad.
To choose the right shutter speed for your desired effect, think about the movement in your scene. Are you trying to freeze a person running or a bird in flight? You’ll need a faster shutter speed for that. Or are you trying to capture the motion of a waterfall or a car driving by? A slower shutter speed will do the trick.
And just like the guitarist, the Shutterbug has his own volume knob – the exposure compensation dial. You can use it to make your photos brighter or darker, just like adjusting the volume on your amp. So don’t be afraid to crank it up or turn it down to get the perfect exposure for your shot.
4. Program Mode
Program mode is like having a backing track to jam along to – it gives you a foundation to work with and allows you to focus on your melody. You can think of the camera’s automatic settings as the backing track, while program mode is like having a bandmate who helps you adjust the tempo and key to suit your playing style.
In program mode, your camera automatically sets the aperture and shutter speed based on the lighting conditions and scene mode you select. This can be handy when you want to quickly capture a shot without fiddling with the settings. But what if you want to adjust the aperture or shutter speed to achieve a certain effect? That’s where the program shift function comes in.
By turning the main dial, you can shift the camera’s default aperture and shutter speed combination while maintaining the same exposure level. Think of it like adding a guitar solo on top of the backing track without changing the rhythm section. This allows you to fine-tune your shot and get more creative with your compositions.
5. Auto Mode
Ah, the trusty old “Auto” mode. It’s like the musician who always plays the same four chords and never tries anything new. Sure, it’s easy and convenient, but where’s the creativity and spontaneity?
Auto mode is perfect for when you’re in a rush and just need to snap a quick photo without fussing over the settings. Your camera does all the work for you, detecting the scene and adjusting the aperture, shutter speed, ISO, and white balance accordingly. It’s like having a one-man band that can play any instrument!
But, like any one-man band, it has its limitations. Auto mode may not always produce the best results in tricky lighting situations or when you want to create a specific mood or effect. Plus, it’s not very customizable, so you can’t fine-tune the settings to your liking.
Think of it like hiring a session musician who can only play one style of music. They might be great at what they do, but they can’t adapt to different genres or add their own personal touch.
So, while auto mode is a handy tool to have in your arsenal, don’t rely on it too heavily. Experiment with the other modes and take control of your camera like a true rockstar!
V. Unleash the Magic: Transform Your Photos with Post-Processing
Alright, let’s talk about post-processing, or as I like to call it, “studio editing”. Just like how a music producer can mix and master a song to make it sound polished and professional, post-processing can take your raw photos and turn them into stunning works of art.
Using editing software like Adobe Lightroom or Photoshop can be a game-changer in your photography journey. You can adjust brightness, contrast, saturation, and sharpness to make your images pop and enhance the colours and details. It’s like having a magical toolbox of sliders and brushes at your disposal.
But just like how a bad mix can ruin a song, over-editing can also ruin a photo. So, it’s important to find a balance and not go overboard with the adjustments. Think of it like seasoning a dish – a little bit can enhance the flavour, but too much can make it unappetizing.
Besides adjusting the basic settings, you can also get creative with post-processing by adding filters, textures, and even compositing different images together. The possibilities are endless, and it’s all up to your imagination and creativity.

Lastly, post-processing also allows you to crop and resize your images for different purposes, such as printing or sharing on social media. You can even adjust the aspect ratio to fit a specific frame or format.
So, don’t be afraid to experiment with post-processing. It may seem daunting at first, but with practice and patience, you’ll be able to elevate your photos to the next level.
I suggest using Adobe Lightroom and Photoshop
READ MORE>> Your Ultimate Guide: How to Edit Photos In Lightroom Classic
VI. Beyond the Rules: A Guide to Ethical and Legal Photography
In music, there are certain ethical and legal considerations that need to be taken into account when creating and sharing music. For example, using samples from other artists’ work without permission can lead to legal troubles, and using offensive lyrics or imagery can have serious ethical implications.
Similarly, in photography, there are certain ethical and legal considerations that need to be kept in mind. For example, taking photos of people without their consent or in a way that goes against their cultural or religious beliefs can be disrespectful and even harmful. Additionally, using copyrighted images without permission can lead to legal issues.
It’s important to educate yourself on the ethical and legal considerations of photography to ensure that you are creating and sharing images in a responsible and respectful manner. There are many resources available online, such as articles and forums, where you can learn more about these topics and engage in discussions with other photographers. By being mindful of these considerations, you can enjoy photography in a way that is both creative and responsible.
VII. The Power of the Right Gear: Elevate Your Photography Game
Alright, let’s dive into the world of gear and equipment in DSLR photography. Just like how a guitar player needs a good amp and pedals to get the right sound, a photographer needs certain gear to get the best shots possible. Let’s take a look at some of the essentials.
First up, there are tripods. Just like a guitarist needs a good stand for their guitar, a photographer needs a stable platform for their camera. Tripods help keep your camera steady and eliminate shaky hands, which is especially important for long-exposure shots or low-light situations.
Next, we have filters. Think of them as guitar effects pedals. Filters can be used to achieve different effects, such as polarizing filters for reducing glare or neutral density filters for slowing down shutter speed in bright conditions.
Lastly, there are lenses. Just like how a guitarist needs different guitars for different sounds, a photographer needs different lenses for different types of shots. A wide-angle lens is great for landscapes, while a telephoto lens is perfect for portraits or wildlife photography.
But with so many options out there, it can be overwhelming to choose the right gear. My advice? Start with the essentials and build your collection over time. And remember, expensive gear doesn’t always guarantee better results. Sometimes it’s more about the skill and creativity of the photographer than the gear they’re using.
So, go forth and experiment with different gear, and don’t forget to have fun!
READ MORE>> Essential Photography Equipment for Beginners: What You Need to Get Started
VIII. Fuel Your Passion: The Importance of Continued Learning and Finding Inspiration
Just like playing an instrument, mastering DSLR photography is a continuous process. There is always something new to learn and different ways to express yourself through your photos.
To keep improving your skills and getting inspired, consider taking online courses, reading books, or attending workshops. It’s like learning a new song or technique on your instrument – the more you practice, the better you become.
In addition, joining online communities or following social media accounts of photographers and photography enthusiasts can provide valuable feedback and inspiration for your photography journey. It’s like jamming with other musicians or attending a concert – you can learn from others and get inspired to try new things.
So keep learning, practicing, and exploring, and who knows, maybe one day you’ll become the Ansel Adams or Jimi Hendrix of DSLR photography!
TL;DR – Snap Like a Rockstar: A Fun and Simple Guide to Taking Great Photos
Step 1: Pick Your “Instrument”
Just like a musician chooses their instrument, you need to pick the right camera for the job. Are you going to a concert? A big, bulky DSLR might be necessary. Just taking some casual snaps of your dog? A smartphone will do the trick.
READ MORE>> The Top 6 Types of Cameras: A Comprehensive Guide to Choosing the Right One for Your Photography
Step 2: Find Your “Key”
In music, the key sets the tone for the entire song. In photography, it’s the same. Find the key element of your photo – the subject that will be the star of the show – and center your shot around that.
Step 3: Set Your “Tempo”
The tempo of a song determines the rhythm and pace. Similarly, in photography, your shutter speed sets the tempo. Want to freeze action with a quick tempo? Use a fast shutter speed. Want to create a dreamy, slow-motion effect? Slow down your shutter speed.
Step 4: Adjust Your “Volume”
Just like music has volume, photography has exposure. Adjust your camera’s aperture and ISO settings to control the exposure of your photo. A wider aperture lets in more light, while a higher ISO makes your camera more sensitive to light.
Step 5: Add Your “Effects”
Music has effects like reverb and distortion, while photography has effects like filters and post-processing. Play around with editing tools to add some extra oomph to your photo.
Step 6: Jam Out!
Once you’ve got all your settings just right, it’s time to hit that shutter button and jam out! Don’t be afraid to experiment and have fun with your photos. Just like music, photography is all about creativity and self-expression. So rock on, and snap away!
IX. Encore Performance: The Final Act of Your Photography Symphony
I hope I wasn’t too much of a one-hit-wonder with these music analogies, but I’m glad I did if it helped you understand things in a snap!
To sum up, mastering composition, exposure, and lighting are crucial for taking great photos. I have covered different DSLR modes, including manual, aperture priority, shutter priority, program, and auto mode. I have also discussed the importance of post-processing and ethics and legal considerations in photography.
To improve your skills, practice and experiment with different techniques, and consider investing in additional gear and equipment such as a tripod or a remote shutter release. I encourage you to share your feedback, questions, and suggestions in the comments section.
Stay tuned for our next post in the series, where I will cover editing techniques to enhance your images. Happy shooting!
Photography is an art that thrives on practice, patience, and a sprinkle of creativity. For quick reference and more in-depth tips, be sure to download my cheat sheet – your trusty sidekick on your photography journey.
If this helped you please share it with your friends. If you want more content delivered to you directly sign up for the newsletter and comment below if you have any questions or comments.
F.A.Q
How do you take pictures for beginners?
Taking pictures as a beginner is all about getting to know your camera or smartphone. Start with the auto mode and practice framing your shots. Experiment with different lighting and angles to see what looks best.
How do I take a picture with this phone?
To take a picture with your phone, open the camera app, aim at your subject, and tap the shutter button (it looks like a circle or a camera icon on the screen). Try to keep your hand steady for a clear shot.
How do you take pictures step by step?
Step 1: Frame your subject. Step 2: Adjust focus (tap the screen where you want to focus if on a phone). Step 3: Set exposure (brightness) if needed. Step 4: Steady your hand. Step 5: Take the shot by pressing the shutter button.
How do you shoot product photos?
For product photos, use good lighting, like natural window light or softbox lamps. Place the product on a clean, simple background. Focus on capturing details and textures. You can use a tripod to keep your camera steady.
How can I shoot product photography at home?
To shoot product photos at home, find a spot with good natural light, like near a window. Set up a clean background, like a white sheet or poster board. Use your camera or smartphone on a tripod for stability. Experiment with angles and compositions until you get the look you want.