Lightroom Classic Tutorial: The Fast-Track Tour You Need Now
Hey there Shutterbug, just wanted to let you know that some of the links on this site may be Amazon Affiliate or affiliate links,. which means I may earn a small commission if you make a purchase after clicking on them. But don't worry, it won't cost you any extra – in fact, sometimes you may even get a special discount! So if you do decide to buy something through my links, know that you'll be supporting my work and helping me bring more helpful content your way. Thank you for your support, you're like a superhero to my work! I couldn't do it without you, unless I suddenly develop the ability to clone myself...which, honestly, would be pretty cool.
Beginner photographers, my Lightroom Classic tutorial is your guide to effortless photo editing.
Are you a budding photographer eager to elevate your editing skills and make your photos shine? If so, you’re in the right place. In this Lightroom Classic tutorial, we’ll embark on a journey through the world of photo enhancement. Get ready to unlock the secrets of this powerful tool. Whether you’re new to Lightroom Classic or looking to brush up on your skills, this tutorial is your key to getting the lay of the land when it comes to mastering the art of photo editing.
Let’s Dive into the Lightroom Classic Tutorial!
Ready to kickstart your Lightroom Classic journey? Great choice! In this section of the Lightroom Classic tutorial, I’m going to ease into things.
Introduction to Lightroom Classic
First things first, what’s Lightroom Classic, you ask? Well, let me shed some light on the world of Lightroom and why Lightroom Classic is your top pick. Think of Lightroom as your digital playground for photo editing, and it comes in a few flavours. You’ve got Lightroom CC, which is a more streamlined, cloud-based version. It’s like the cool kid who loves simplicity, but sometimes you need a bit more than that.
Now, there’s Lightroom Mobile, great for on-the-go editing, but it’s like snacking when you’re craving a full-course meal. And then, there’s Lightroom Classic, the heavyweight champion of the Lightroom family. It’s your digital darkroom, your photo magician’s toolkit, and it’s about to become your new best friend.
But why choose Lightroom Classic? Well, it’s like having all the tools in a master craftsman’s workshop. You get powerful features like robust editing, extensive organization capabilities, and the speed to handle large libraries. When you’re serious about your photography, Lightroom Classic is the go-to choice. It’s like driving a sports car when others are on bicycles.
So, this Lightroom Classic tutorial is all about demystifying the magic and making it accessible for you. Let’s get the lay of the land.
Installing Lightroom Classic on Your Computer

Installing Lightroom Classic on Your Computer is a breeze, and it’s about to become as second nature as setting up your camera for that perfect shot. Let’s break it down step by step.
1. Start with the Purchase: Visit Adobe’s website, and create or log in with your Adobe ID. Here, you’ll purchase the Lightroom Classic subscription, just like selecting the right lens for your camera.
2. Payment and Plan: Select your preferred plan. Adobe usually offers subscription plans, like the Photography 20GB plan (this is the one I personally have). Choose the one that fits your needs and budget. Think of it as picking the right focal length for your lens.
3. Enter Payment Details: Now, enter your payment details. This secures your access to Lightroom Classic, just like buying a ticket to a photography workshop. Ensure your payment info is accurate, and then proceed.
4. Confirmation: Adobe’s payment process is secure and user-friendly. After payment, you’ll receive a confirmation – your golden ticket to the world of photo editing possibilities, much like buying your first camera.
5. Download Lightroom: After purchasing, you’ll be directed to the download page. Click on ‘Get started’ or ‘Download’ – think of it as choosing the lens for your camera. The installation file will begin to download. Just let it work while you prepare for the next steps.
6. Install Lightroom: Locate the downloaded installation file; it’s like unboxing a new camera accessory. Double-click it to begin the installation. Follow the on-screen instructions, choosing where you want Lightroom Classic to be installed and if you want shortcuts on your desktop. It’s as intuitive as adjusting your camera’s focus.
7. Wait for Installation: After a few clicks, Lightroom Classic starts installing. Just be patient, like waiting for the perfect lighting conditions. Once it’s done, you’re ready to launch Lightroom Classic – as exciting as capturing that once-in-a-lifetime shot.
Now, you’ve got a clear order of the steps for installing Lightroom Classic. In the next section, I’ll guide you through the Lightroom Classic interface, ensuring you can find every tool and option with ease. Say goodbye to confusion, and hello to creativity!
Navigating the Lightroom Classic Interface

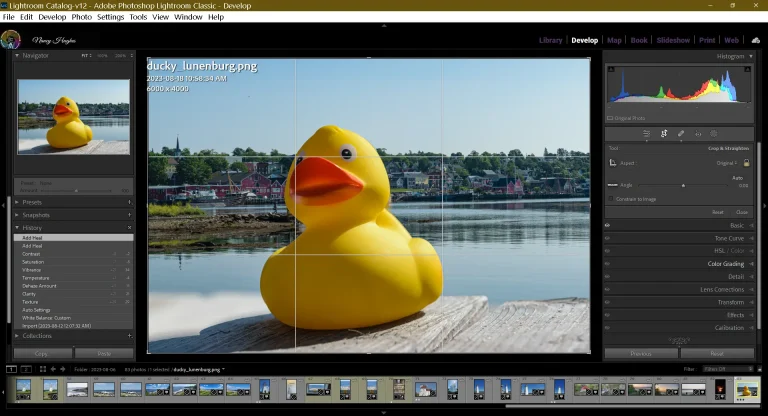
Feeling a bit overwhelmed by all those buttons and sliders? Let’s take a look at the basics, you will notice there is seven modules at the top, Library, Develop, Map, Book, Slideshow, Print and Web.
Here is a quick tour of each of these modules:
Library:
- Import and Organize: Use this panel to import your photos and organize them into folders and collections.
- Ratings and Keywords: Assign ratings and add keywords to make finding your photos a breeze.
- Quick Develop: Make basic adjustments like exposure and contrast right here.
- Filters: You can filter your photos based on various criteria, like camera type, date, and more.
Develop:
- Editing Tools: This panel is where the magic happens. Adjust exposure, contrast, color balance, and more.
- Presets: Apply pre-made settings to give your photos different styles quickly.
- Cropping and Straightening: Make composition changes here, like cropping out distractions.
- Spot Removal: Remove blemishes or unwanted objects from your photos.
Map:
- Geotagging: If your camera or smartphone tags your photos with location data, you can see them plotted on a map. You can also use this to add geotag information to your photos.
- Location-Based Sorting: Easily find photos taken in specific places.
- View Modes: Choose how you want the map to display, like satellite view or road map.
Book:
- Create Photo Books: Design photo books with different layouts and styles.
- Layout and Text: Customize each page with your photos and add text to tell your story.
- Export for Printing: Once your book is ready, you can export it for printing or sharing digitally.
Slideshow:
- Create Presentations: Build captivating photo slideshows for special occasions or share your work.
- Transitions: Add transitions between photos for a professional touch.
- Music and Timing: Include background music and control the timing of each slide.
Print:
- Print Setup: Set up your printing preferences, like paper size, quality, and colour management.
- Layout Options: Choose how your photos will be arranged on the printed page.
- Print Sharpening: Adjust sharpening settings for printing.
Web:
- Create Web Galleries: Design web galleries to showcase your photos online.
- Customization: You can choose layouts, colours, and more to match your style.
- Publishing: Once your web gallery is ready, you can publish it on the web for others to see.
Each panel in Lightroom serves a specific purpose, making it a versatile tool for all your photography needs.
Let’s Get Your Photos into the Lightroom Classic Playground!
Alright, shutterbug, it’s time to bring those fantastic photos into the world of Lightroom Classic. This part of our Lightroom Classic tutorial will make you the master of photo importing and organization.
Bringing Your Photos into Lightroom Classic


Remember that incredible shot you took during your last adventure? It’s time to let it shine in Lightroom Classic! I’ll show you two simple ways to get your photos in:
Importing from a Camera or Memory Card:
1. Plug your camera or insert your memory card into your computer, just like connecting a USB drive.
2. Open Lightroom Classic and head to the Library module. It’s where you organize your photos.
3. Look for the “Import” button and click it. It’s like opening a door to your photo world.
4. In the import window, you’ll see your camera or memory card listed on the left side. Click on it.
5. On the right, you’ll find options to choose where you want to store your photos. Pick a folder or create a new one.
6. Now, click the “Import” button in the lower right corner. Lightroom Classic will start copying your photos to your computer.
7. Voila! Your photos are now in Lightroom Classic, ready to be edited and organized.
Importing from Your Computer:
1. Open Lightroom Classic. It’s like turning on your computer.
2. In the Library module, click “Import” just like you would when bringing in photos from your camera.
3. In the import window, look on the left for your computer’s name. Click on it.
4. Now, on the right, you can navigate to the folder where your photos are stored on your computer.
5. Once you’ve found your photos, click the “Import” button in the lower right corner.
6. Lightroom Classic will add your photos to its library, and you’re all set to work your magic on them.
Importing photos is as simple as connecting a USB drive or finding files on your computer. Lightroom Classic makes it easy to get your pictures in one place for editing and organization.
Organizing Your Image Library
Now that your photos are in, let’s keep things neat and tidy, shall we? Nobody likes digging through a messy room for that favourite toy.
Creating Folders and Collections:

Think of Lightroom Classic as your personal filing cabinet. I’ll help you create folders and collections to keep your photos organized, whether it’s by date, location, or any other way that tickles your fancy.
- Open Lightroom Classic and head to the Library module. It’s where you organize your photos, just like your personal filing cabinet.
- Look for the “Library” panel on the left, and you’ll see “Folders.” Right-click there, and choose “Add Folder.” It’s like creating a new drawer in your cabinet.
- Name your folder, and you can even choose where to save it on your computer.
- Now, inside your folder, you can create collections. Collections are like putting photos into labelled boxes.
- Right-click on your folder, select “Create Collection Set,” and name it. It’s like creating a section in your drawer.
- Inside the collection set, right-click and choose “Create Collection.” Name it based on how you want to organize your photos.
- Now, drag and drop your photos into the collection, just like placing files in a box.
- Your photos are organized neatly into folders and collections, making it easy to find them when you need to.
Adding Keywords and Tags for Easy Retrieval:

Remember that awesome sunset pic you took on your road trip? With keywords and tags, you’ll find it faster than you can say ‘golden hour.’ I’ll show you how to label your photos so you can find them with a snap of your fingers.
- In the Library module, select the photos you want to tag. It’s like picking out the items you want to label.
- Look for the “Keywording” panel on the right. If you don’t see it, go to the “Window” menu and select “Keyword List.”
- Start typing keywords that describe your photos. For your awesome sunset pic, type “sunset,” “road trip,” and any other relevant words.
- Hit “Enter” after each keyword to add it. It’s like attaching labels to your photos.
- Now, your photos are tagged and easy to find. If you want to see all your sunset pics, simply click on the “sunset” keyword, and Lightroom Classic will show them to you.
Creating folders and collections is like having your own photo filing system, and adding keywords is like putting labels on your photos, so you can find them with a snap of your fingers. It’s all about staying organized in the world of photography.
Let’s Play Detective with Your Photos!
Now that you’ve got your photos all cozy in Lightroom Classic, it’s time to put on your detective hat. In this part of the Lightroom Classic tutorial, I’ll show you how to review, compare, and select the best shots like a pro.
Viewing Your Images in Grid and Loupe View:


Think of Grid and Loupe views as your magnifying glasses for photos.
1. Open Lightroom Classic and go to the Library module. It’s like your photo gallery.
2. In the Library module, look for the “Grid View” and “Loupe View” buttons. Grid View shows many photos at once, while Loupe View lets you zoom in on one photo. You can also press ‘g’ and ‘e’ respectively on our keyboard to get into those views.
3. To see lots of photos together, click “Grid View” or press ‘g’. It’s like having all your photos in one place.
4. To look closely at one photo, click “Loupe View” or press ‘e’ It’s like using a magnifying glass.
5. Use the arrow keys to go through your photos one by one. It’s as easy as flipping through a photo album.
Side-by-Side Comparison for Choosing the Best Shots:
Imagine you’re at an ice cream parlour with a menu full of delectable flavours. Side-by-side comparison in Lightroom Classic is like having a tasting spoon to sample each flavour before choosing your favourite scoop. It lets you compare your photos like a connoisseur, ensuring you pick the most delicious shot for your collection.
1. In the Library module, select the photos you want to compare. It’s like choosing your ice cream flavours.
2. Highlight the photos you want to compare and go to the “Photo” menu and choose “Survey View” or press ‘n’ on your keyboard. This is where you can compare photos side by side.
3. Drag the photos you want to compare to the bottom area. It’s like putting your ice cream flavours on a tasting plate.
4. You can zoom in or out to see the details. It’s as easy as adjusting the TV volume.
5. Decide which photo you like the most, and you can mark it with a star or label. It’s like picking your favourite ice cream flavour. You’re in control!
Understanding the Histogram and Basic Image Information:

Ever looked at a histogram and thought it was some sort of secret code?
1. In the Library module, select a photo. It’s like choosing a book to read.
2. Look for the “Histogram” panel on the right. If you don’t see it, go to the “Window” menu and select “Histogram.”
3. The histogram is like a bar graph for your photo. It shows the dark and bright parts.
4. Check the numbers under the histogram. They tell you the photo’s size, ISO, and other details.
5. Understanding the histogram helps you see if your photo is too dark or too bright. It’s like having X-ray vision for your photos.
Using Flags, Stars, and Labels for Photo Selection:
Think of flags, stars, and labels as your trusty tools for organizing your photo collection. Flags are like placing a neon sign on your favourites, stars are the gold stars you awarded your top-notch childhood drawings, and labels are the tags that make finding your favourite book on a cluttered bookshelf a breeze.
1. In the Library module, select a photo you like. It’s like picking your favourite candy from a box.
2. Look for the “Quick Develop” panel on the right. If you don’t see it, go to the “Window” menu and select “Quick Develop.”
3. You’ll find flags, stars, and labels. Flags are like saying “I like this one!” Stars let you rate your photos from 1 to 5, with 5 being the best.
4. Labels are like tags that say what the photo is about. You can choose a colour for each label, like red for sunset or blue for flowers.
5. Use flags, stars, and labels to organize your photos and find the best ones. It’s like making a treasure map for your photo collection.
With these simple steps, you’ll become a pro at viewing, understanding, and selecting your photos in Lightroom Classic. It’s like a fun treasure hunt with your favourite ice cream at the end!
Time to Sprinkle Some Editing Magic on Your Photos!
Alright, superstar photographer, it’s time to make your photos pop like never before. In this part of our Lightroom Classic tutorial, we’re hopping into the world of basic photo enhancement.
Basic Photo Editing in Lightroom Classic:

Adjusting Exposure, Contrast, and White Balance:
These are your photography’s three musketeers. When a photo looks too dull or too bright this is your friend. Just think of it as finding the right lighting for your room.
- Click on the “Develop” module in Lightroom Classic.
- Find the “Basic” panel on the right.
- Adjust the “Exposure” slider to make your photo brighter or darker.
- Use the “Contrast” slider to enhance the difference between light and dark areas.
- Fine-tune the “White Balance” to set the right colour temperature (warmer or cooler).
- Experiment with these sliders until your photo looks just the way you want.
Cropping and Straightening Your Images:
Sometimes, life throws in distracting backgrounds or tilts your horizon. It’s as common as straightening a crooked painting on the wall.
- In the “Develop” module, find the “Crop & Straighten” tool.
- Click on it to activate the cropping overlay.
- Adjust the cropping frame by dragging the corners and edges.
- To straighten, use the angle adjustment tool (a curved arrow) to align with the horizon.
- Once you’re satisfied, hit “Enter” or “Done” to apply the crop and straightening.
Creative Enhancements with Presets and Filters:
Now, it’s time to let your creative juices flow. Imagine Lightroom Classic as your art studio, and presets and filters as your paintbrushes.
Using Presets:
- In the “Develop” module, find the “Presets” panel on the left.
- Browse the available presets or create your own.
- Click on a preset to apply it to your photo instantly.
Applying Filters:
- In the “Develop” module, find the “Filter” options.
- Experiment with filters like “Grain,” “Vignette,” or “Dehaze” to add unique effects.
- Adjust the intensity of the filter by moving the sliders.
Retouching and Removing Unwanted Elements:
Ever taken a perfect shot, only to discover a photobomber or an unwanted blemish in the frame? It’s like finding an unexpected guest in your family photo. But don’t worry, I’ve got the digital magic wand.
Spot Removal Tool:
- Locate the “Spot Removal” tool in the “Develop” module.
- Adjust the brush size to cover the unwanted element.
- Click on the unwanted element to let Lightroom automatically replace it with a nearby area.
Clone and Heal:
- In the “Spot Removal” tool, you can choose between “Clone” and “Heal” modes.
- “Clone” replicates the chosen area, while “Heal” blends it for a more natural look.
- Use the mode that best suits your retouching needs.
These step-by-step instructions should help you perform basic photo edits, apply presets and filters, and retouch your photos in Lightroom Classic. Remember, practice makes perfect, and your editing skills will improve over time. Just have fun playing around. Lightroom Classic is non-destructive so any edits you do you can reverse at any time if you don’t like them.
READ MORE>> Your Ultimate Guide: How to Edit Photos In Lightroom Classic
Time to Show Off Your Photography Skills!
Congratulations, photo guru! You’ve edited your images to perfection in Lightroom Classic, and now it’s time to let the world see your talent. In this final part of our Lightroom Classic tutorial, we’ll guide you on how to share your masterpieces like a pro.
Exporting Your Edited Photos:
- 1. Getting Photos Out of Lightroom Classic:
- In the “Library” module, select the edited photos you want to export.
- Go to the “File” menu and choose “Export.”
- 2. Choosing the Right Format and Size:
- In the Export dialogue, under the “File Settings” section, select the format (e.g., JPEG) for your photos.
- Adjust the quality and resolution settings as needed.
- Choose the right dimensions (size) for your images.
- 3. Adding Watermarks for Copyright Protection (optional):
- In the Export dialog, navigate to the “Watermarking” section.
- Enable the watermark option.
- Customize your watermark, including its position and opacity.
Sharing on Social Media and Photography Communities:
- 1. Preparing for Sharing:
- After exporting your photos, go to your preferred social media platform or photography community.
- 2. Uploading Your Photos:
- Follow the platform’s upload process, which usually involves selecting the images from your computer and adding captions or descriptions.
Printing Your Photos for Display:

- 1. Preparing Photos for Printing:
- In Lightroom Classic, navigate to the “Print” module.
- Adjust the print settings, including paper size, layout, and colour profiles.
- Preview your print layout before proceeding.
- 2. Printing Your Photos:
- Connect your printer to your computer.
- Click the “Print” button in Lightroom Classic.
- Follow the printer’s instructions to complete the printing process.
By following these simplified steps, you can successfully export, share on social media, and prepare your photos for printing using Lightroom Classic. Enjoy showcasing your photography skills to the world, both digitally and in print!
Conclusion: Your Lightroom Classic Journey Begins Now!
And there you have it, dear photography enthusiast! This Lightroom Classic tutorial has taken you on an exciting ride through the world of photo editing and enhancement. Let’s recap the key takeaways:
- You’ve learned how to get started with Lightroom Classic, turning it from a mystery into a powerful tool at your disposal.
- I’ve guided you through importing, organizing, and reviewing your photos, ensuring you can always find that perfect shot.
- You’ve become an editing wizard, mastering the basics, unleashing your creativity with presets and filters, and even learning how to retouch like a pro.
- Finally, you’re all set to share your masterpieces with the world, whether it’s on social media, in photography communities, or as beautiful prints on your wall.
Now, here’s your call to action: Don’t let this newfound knowledge sit idle! Grab your camera, import those photos, and start editing with confidence. Share your creations and connect with fellow photographers who are on the same exciting journey.
Remember, practice makes perfect, and your Lightroom Classic skills will only get better with time. So go ahead, explore, create, and make your photography dreams come true. This Lightroom Classic tutorial has given you the keys to unlock your full creative potential. Happy editing!
Ready to dive into Lightroom Classic with confidence? Download my handy cheat sheet for quick reference and start learning Lightroom Classic today!
If this helped you please share it with your friends. If you want more content delivered to you directly sign up for the newsletter and comment below if you have any questions or comments.

F.A.Q
What is Lightroom Classic used for in photography?
Lightroom Classic is a powerful photo editing software used by photographers to enhance and edit their images, adjust exposure, colours, and more.
How can I import photos into Lightroom Classic?
To import photos, open Lightroom Classic, go to the Library module, click “Import,” and select the photos you want to bring into your catalogue.
What are Lightroom Classic presets, and how do I use them?
Presets are pre-configured settings that you can apply to your photos for quick edits. To use them, go to the Develop module, click the Presets panel, and choose a preset that suits your photo style.
Can I undo changes in Lightroom Classic if I make a mistake?
Yes, you can undo changes by pressing Ctrl+Z (Windows) or Command+Z (Mac), or you can use the History panel to step back through your editing history.
How do I export my edited photos from Lightroom Classic?
To export photos, go to the Library module, select the images you want to export, click “File,” then “Export.” Choose your export settings, including format and quality, and click “Export” to save your edited images.


Never Stop Pursuing Photography Prowess