Lesson 2: Focus Like a Pro: How to Focus for Sharp Photos
Hey there Shutterbug, just wanted to let you know that some of the links on this site may be Amazon Affiliate or affiliate links,. which means I may earn a small commission if you make a purchase after clicking on them. But don't worry, it won't cost you any extra – in fact, sometimes you may even get a special discount! So if you do decide to buy something through my links, know that you'll be supporting my work and helping me bring more helpful content your way. Thank you for your support, you're like a superhero to my work! I couldn't do it without you, unless I suddenly develop the ability to clone myself...which, honestly, would be pretty cool.
Picture this: you’re capturing a once-in-a-lifetime moment, but your photo turns out disappointingly blurry. Don’t let that happen again! Discover how to focus like a pro.
Welcome to my ultimate guide on mastering how to focus! In this comprehensive tutorial, I’ll delve into the essence of focus, teaching you what it is and how to achieve it with precision. From understanding focus modes and techniques to honing your skills in capturing sharp photos, I leave no stone unturned.
But our journey doesn’t end there. I’ll also explore the realm of post-production, revealing tips and tricks to enhance focus in your images through careful adjustments. By the end, you’ll have all the tools you need to create stunning, tack-sharp photographs that leave a lasting impression. Let’s dive in and embark on this enlightening journey together.
If you missed Lesson 1, check it out here: How to Take a Photo: Picture Perfect in 14 Steps
How to Focus: Understanding DSLR Camera Focus
Let’s kick things off by addressing the big question: where should you focus your DSLR camera? It’s like having a magnifying glass to explore the world of photography.
Where You Should Focus
Alright, let’s get down to the nitty-gritty of DSLR Camera Focus. Knowing where to direct your focus is like the secret sauce that transforms your snapshots into masterpieces. So, what’s the scoop?
Where to Focus When Taking Photos
Imagine you’re in picturesque Nova Scotia, ready to capture its natural wonders. You’ve got your trusty DSLR in hand, but where should you point it?
Telephoto DSLR Camera Focus:

When it comes to telephoto DSLR camera focus, you’re often dealing with distant subjects, like the magnificent wildlife in Nova Scotia. To achieve precise focus, consider the following:
- Select the Right Autofocus Mode: For still subjects, using Single-Servo AF (AF-S) can provide accurate focus. However, for moving wildlife, it’s often best to use Continuous-Servo AF (AF-C) to keep tracking and adjusting focus as the subject moves.
- Use a Telephoto Lens: Equip your DSLR with a telephoto lens with image stabilization (IS) to reduce camera shake when shooting at longer focal lengths.
- Control Depth of Field: Adjust your aperture (f-stop) to control depth of field. A wider aperture (lower f-number) can create a shallow depth of field, isolating your subject from the background, while a narrower aperture (higher f-number) can keep more of the scene in focus.
- Monitor Focus Points: Pay attention to your camera’s autofocus points, ensuring they are placed over the area of your subject that you want to focus on.
Cracking the Code of Moving Subjects:

When capturing moving subjects, the key is to maintain sharp focus even when life is in motion. Here’s how to tackle it:
- Use Continuous Autofocus: Set your camera to Continuous-Servo AF (AF-C) mode, allowing it to continually adjust focus as the subject moves. This mode is excellent for tracking fast-moving subjects like birds in flight or athletes on the field.
- Predict Subject Movement: Anticipate the path of your moving subject and pre-focus on a spot where you expect it to be. This can help you capture the subject in focus when it reaches that spot.
- High Shutter Speed: Utilize a high shutter speed to freeze the action. A fast shutter speed minimizes motion blur and ensures a sharper image.
Portrait Perfection:
Creating captivating portraits relies heavily on precise focus. Here are some tips to help you focus on the essence of your subject:
- Eyes First: When shooting portraits, focus on the eyes. The eyes are the windows to the soul, and having them in sharp focus can make your subject’s personality shine through.
- Wide Aperture (Low f-number): To achieve a beautiful background blur (bokeh) that isolates your subject, use a wide aperture. This makes the eyes stand out.
- Single-Point Autofocus: Select a single autofocus point and position it over one of the subject’s eyes. This ensures that the most critical part of the portrait is perfectly sharp.
- Face Detection: If your camera has face detection, use it to automatically focus on the subject’s face. This can be especially helpful for group portraits.
Unlocking Landscape DSLR Camera Focus:
When capturing Nova Scotia’s breathtaking landscapes, achieving the perfect focus is essential. Follow these steps to make every detail pop:
- Use a Tripod: For landscape photography, a tripod is your best friend. It stabilizes your camera, reducing the risk of camera shake, and allows you to use slower shutter speeds.
- Narrow Aperture (High f-number): To keep the entire landscape in focus, choose a narrow aperture like f/16 or f/22. This deep depth of field ensures both the foreground and the distant horizon are sharp.
- Hyperfocal Distance: Learn about hyperfocal distance, a technique that allows you to focus in a way that maximizes the sharpness from near to far.
Side, Foreground, Background, and Center DSLR Camera Focus:
Focusing in different scenarios and composing your shot effectively is crucial for compelling photography. Here’s what to focus on in various situations:
- Side Focus: When you want to highlight something on the side, use a single autofocus point and place it over the subject or element you want to emphasize.
- Foreground Focus: If you have an interesting element in the foreground, focus on it using a narrow aperture to ensure it’s sharp.
- Background Focus: To make the background the star, focus on the distant scene, allowing the foreground to be soft and dreamy. Use a wide aperture (small f-number) for this effect.
- Center Focus: When your subject is the center of attention, use the central autofocus point or choose your focus point manually and place it over the subject.
With DSLR Camera Focus as your trusty sidekick, you’ll have the power to choose where to direct your viewer’s attention, creating photos that tell compelling stories and capture the essence of your subject. Remember, mastering DSLR Camera Focus opens up a world of creative possibilities and allows you to capture stunning images in diverse scenarios.
Manual and Auto DSLR Camera Focus
Alright, my fellow shutterbugs, let’s dive into the fascinating world of DSLR camera focus. We’re going to explore the heart of your camera’s focusing capabilities and help you become a focus maestro. So, grab your camera, and let’s roll!
The Basics of Manual and Auto Focus
First things first, let’s talk about the two primary ways your camera achieves focus: manual and auto focus. It’s like choosing between driving an old-school stick shift or cruising in a sleek automatic.

- Manual Focus: This is where you take full control. You twist the focus ring on your lens, making subtle adjustments until your subject appears sharp in the viewfinder or on the LCD screen. It’s a hands-on, precise approach that gives you complete creative control.
- Auto Focus (AF): In this mode, your camera takes the reins. It uses a series of sensors and algorithms to calculate and adjust the focus for you. It’s fast and convenient, making it perfect for those spontaneous moments when you need to capture the action quickly.
Understanding Autofocus Points
Now, let’s zoom in on a crucial aspect of autofocus: autofocus points. Think of them as little focus detectives that your camera deploys to lock onto your subject.
Autofocus points are like the secret agents of your camera’s viewfinder, working diligently to detect and focus on specific elements within your frame. Here’s how to use them effectively and why they’re crucial for your photography:
How to Use Autofocus Points:
- Select the Right Autofocus Mode: Before delving into autofocus points, choose the appropriate autofocus mode. For stationary subjects, like landscapes or posed portraits, the Single-Servo AF (AF-S) mode works well. It focuses once and locks onto the subject. For moving subjects, opt for the Continuous-Servo AF (AF-C) mode, which continually adjusts focus as the subject moves.
- Navigate Your Camera’s Menu: Access your camera’s menu to select the desired autofocus point or area. You can often choose a single point, or a group of points, or even let the camera select the point automatically.
- Place the Point Strategically: Depending on your subject and composition, position the autofocus point over the element you want to focus on. For portraits, it’s often the subject’s eyes. In landscapes, it might be a prominent feature in the scene. Take time to experiment and see which focus point suits your composition best.
Why Autofocus Points Matter:
- Precision: Autofocus points allow you to pinpoint the exact area you want to focus on, ensuring sharpness where it matters most. This precision is vital, especially in situations where depth of field plays a crucial role.
- Control: They provide you with control over the composition. Instead of letting the camera decide what to focus on, you decide. This control is particularly valuable when you have complex scenes with multiple potential subjects.
- Creativity: Using autofocus points creatively can add depth and dimension to your photos. Placing the point strategically can emphasize certain elements and create a more compelling visual story.
- Flexibility: Different scenarios call for different focus points. Understanding how to navigate and choose the right point gives you the flexibility to adapt to various shooting conditions.
In essence, mastering the use of autofocus points empowers you to take control of your camera’s focus, leading to sharper, more creative, and thoughtfully composed photographs. So, the next time you’re behind the viewfinder, remember that these tiny focus detectives are there to help you capture the perfect shot.
Comparing Manual vs. Autofocus
Choosing between manual and autofocus is like deciding whether to cook a gourmet meal from scratch or order takeout – both have their merits.
- Manual Focus: It’s all about precision and creative control. You decide exactly where to focus, which can be particularly useful in tricky situations or when you want to create a specific artistic effect.
- Autofocus: It’s your trusty sidekick when you need speed and convenience. Perfect for situations where you need to capture the moment without the luxury of time.
Overview of Autofocus Modes
Now, let’s explore the different autofocus modes your camera offers. It’s like having multiple tools in your belt for different tasks.

- Single Autofocus (AF-S): This mode locks focus on a single point and keeps it there until you press the shutter button. Ideal for stationary subjects.
- Continuous Autofocus (AF-C): Designed for moving subjects, this mode continuously adjusts focus as long as you hold the shutter button halfway down.
- Automatic Autofocus (AF-A): This mode automatically switches between AF-S and AF-C based on the subject’s movement. It’s like having an adaptive focus system.
- Manual Focus (MF): This mode lets you take full control and focus manually using the focus ring on your lens.
Check out one of my favourite YouTubers Jared Polin from Fro Knows Photos: Cameras Focus Modes Explained: When to Use Continuous Auto Focus, Single Auto Focus or Manual Focus
By understanding the basics of manual and autofocus, mastering autofocus points, and knowing when to use different autofocus modes, you’ll have a profound understanding of DSLR Camera Focus. With this knowledge, you’ll be able to choose the best focus method for every photographic situation.
How to Focus: Selecting Autofocus Points
Alright, fellow photography explorers, it’s time to dive even deeper into the captivating world of DSLR Camera Focus. In this section, we’ll focus on the art of selecting autofocus points, ensuring your shots hit the bullseye every time. So, grab your camera, and let’s get into the zone!
Step-by-Step Guide for Beginners How to Focus
Let’s kick things off with a step-by-step guide on how to select autofocus points, tailored specifically for beginners. Think of it as your trusty map through the autofocus jungle.
- Locate the Autofocus Button: On your camera, look for a button or a control dial that allows you to access autofocus settings.
- Activate Autofocus Mode: Switch your camera to autofocus mode, often labelled as AF.
- Navigate the Focus Points: Using your camera’s control wheel or joystick, you can now move around and select the focus point that aligns with your subject.
- Lock the Focus: Once you’ve positioned the focus point where you want it, gently press the shutter button halfway down to lock the focus.
- Take the Shot: With the focus locked, press the shutter button all the way to capture your perfectly focused image.
Importance of Choosing the Right Focus Point
Now that you know how to select autofocus points, let’s understand why it’s crucial. Think of autofocus points as the secret to bringing your vision to life.
- Framing and Composition: Different focus points allow you to control where the viewer’s eye is drawn in your photo. This can significantly impact the overall composition and storytelling of your image.
- Precision and Clarity: The right focus point ensures that the key subject in your frame is crystal clear, while other elements may fall into a beautiful blur.
Tips for Off-Center Subjects
Sometimes, your subject doesn’t sit right in the middle of your frame. Here are some tips for dealing with off-center subjects:
- Focus and Recompose: Select an autofocus point over your subject, lock focus, and then recompose your shot to your desired composition while keeping the focus locked.
- Use an Off-Center Focus Point: Many cameras offer autofocus points away from the center. Explore these options to make off-center focusing a breeze.
Manual Focus Techniques for Beginners How to Focus
Manual focus might sound intimidating, but it’s a valuable skill to have in your toolkit. Here’s a quick overview:
- Use the Focus Ring: Turn the focus ring on your lens to manually adjust the focus until your subject appears sharp. You can use the LCD screen and zoom in as far as you need to get the sharpness you desire.
Dealing with Moving Subjects and How to Lock Focus
When your subject is on the move, ensuring they stay in focus can be a challenge. Here’s how to handle it:
- Continuous Autofocus (AF-C): Switch to AF-C mode for moving subjects. Your camera will continuously adjust focus as long as you hold the shutter button halfway down.
- Back-Button Focus: Assign the autofocus function to a button on the back of your camera, allowing you to separate focus from the shutter button. This makes it easier to lock focus and then take the shot.
Close-Up Photography and Focusing on the Eyes
In close-up photography, nailing the focus on your subject’s eyes is paramount. It’s like capturing the windows to their soul. Here’s how:
- Select a Single Focus Point: Choose a single focus point and position it directly over the subject’s eye.
- Use a Smaller Aperture: Smaller apertures (higher f-numbers) provide a wider depth of field, ensuring both eyes are in focus.
By mastering the selection of autofocus points, you gain precise control over your composition and clarity, making your photos stand out. Whether your subject is off-center, moving, or up close, you’ll be armed with the knowledge to achieve exceptional focus.
How to Focus: Improving Your Focus Skills
In this section, we’ll delve into techniques to elevate your focus game and ensure your shots are nothing short of spectacular. Get ready to fine-tune your skills!
Review Your Shots
So, you’ve clicked the shutter button and captured a masterpiece (or at least you hope so). Now, it’s time to scrutinize your work and make sure your focus game is on point.
Checklist for Reviewing Your Photos
Think of this as your handy checklist for ensuring your photos are as sharp as they can be:
✅ Did You Focus on the Correct Eye (For Portraits)?: In portrait photography, the eyes are often the focal point. Double-check that you’ve nailed the focus on the right eye, especially if your subject’s head is at a slight angle.
✅Evaluating Face Focus in Portraits: Zoom in on your subject’s face and ensure every detail, from the freckles to the eyelashes, is crisp and clear.
✅Checking Overall Shot Focus: Take a step back and look at the big picture. Is the primary subject in focus, and does the background complement the composition?
✅Assessing Where You Focused in the Frame: Did you intentionally focus on a specific element, or did your camera decide for you? Make sure the focus point aligns with your creative vision.
✅Identifying Camera Shake and Its Impact on Focus: Camera shake can blur your shots, so check for any signs of blurriness caused by shaky hands. If needed, consider using a tripod or increasing your shutter speed.
✅Ensuring Sharpness of the Subject and Background: For landscapes and certain compositions, you might want both the subject and the background to be sharp. Make sure your settings align with this goal.
By going through this checklist, you’ll fine-tune your critical eye and ensure that each shot is a masterpiece in the making.
Sharpening a Photo in Post-Processing

Welcome to the final leg of our journey into the world of DSLR Camera Focus! Now that you’ve honed your focusing skills, it’s time to put the finishing touches on your masterpieces. We’re going to dive into the magical realm of post-processing, where your images will truly come to life.
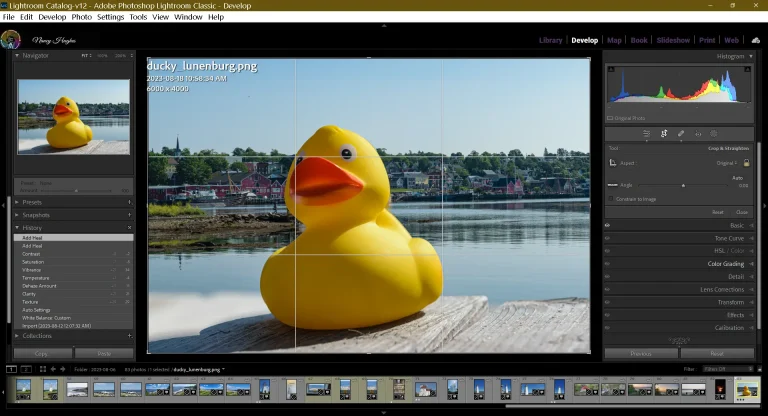
Step-by-Step Guide on How to Sharpen Photos in Lightroom Classic
Lightroom Classic is a powerful tool that can take your photos from good to outstanding. Let’s walk through the process of sharpening your images step by step:

- Import Your Image: Launch Lightroom Classic and import the photo you want to work on.
- Access the Develop Module: Once your image is imported, go to the “Develop” module.
- Navigate to the Detail Panel: On the right side of the Develop module, you’ll find the “Detail” panel. This is where the magic happens.
- Zoom In: To fine-tune your sharpening, zoom in on a part of your image where you want to enhance the details.
- Adjust the Amount: Start by adjusting the “Amount” slider. This controls the strength of the sharpening effect. Be subtle; too much sharpening can introduce noise.
- Radius and Detail Sliders: The “Radius” slider controls the size of the details that get sharpened, and the “Detail” slider fine-tunes the sharpening of smaller details. Find the right balance for your image.
- Masking for Precision: The “Masking” slider is your secret weapon. Hold down the “Alt” key (or “Option” key on Mac) while moving the slider to reveal which parts of your image will be sharpened. Adjust it to target only the areas that need sharpening.
- Before and After: Always check the “Before and After” view to see the impact of your sharpening adjustments.
- Export Your Sharpened Image: Once you’re satisfied with the sharpening, export your image in your preferred format and size.
The Importance of Post-Processing for Enhancing Focus
Post-processing isn’t just about correcting mistakes; it’s about enhancing the strengths of your photos. When it comes to focus, post-processing can bring out the sharpness and clarity that might be hiding in your raw images.
Techniques to Bring Out Sharpness in Your Images
Besides sharpening, there are other post-processing techniques that can help accentuate the focus in your images:
- Contrast Adjustment: Boosting contrast can make your subject stand out and appear sharper.
- Clarity and Dehaze: These adjustments can add a sense of crispness to your photos.
- Selective Editing: Use tools like brushes or masks to target specific areas for extra sharpening.
Balancing Sharpness with Other Aspects of Post-Processing
While sharpening is vital, remember that it’s just one piece of the post-processing puzzle. Be sure to balance sharpness with other aspects like exposure, colour correction, and composition to create a harmonious final image.
With these post-processing techniques at your disposal, you can take your well-focused shots and transform them into breathtaking masterpieces. Remember, post-processing is an art in itself, so don’t be afraid to experiment and develop your unique style.
READ MORE>> Your Ultimate Guide: How to Edit Photos In Lightroom Classic
That’s a Wrap
We’ve uncovered the secrets to mastering DSLR Camera Focus, from understanding where to focus in different scenarios to how to focus by mastering the art of manual and autofocus. Remember, precision in focus is the key to turning your photography from good to outstanding.
To keep sharpening your skills and stay updated on more photography tips, don’t forget to sign up for our newsletter. With every click, you’re one step closer to capturing those picture-perfect moments. Happy focusing, and may your DSLR camera always find the sweet spot!
Ready to enhance your DSLR camera focus skills further? Download our exclusive cheat sheet for quick reference, and take your photography to the next level!
If this helped you please share it with your friends. If you want more content delivered to you directly sign up for the newsletter and comment below if you have any questions or comments.
F.A.Q
How do I achieve sharp focus in my DSLR photos?
This question often relates to the techniques and settings required to ensure that subjects are in focus and the background is appropriately blurred (bokeh).
What are autofocus points, and how do I use them on my DSLR?
Many beginners want to understand how to select and utilize autofocus points effectively for different types of photography.
Should I use manual focus or autofocus for my DSLR photography?
This question explores the pros and cons of both manual and autofocus modes and when to use each for optimal results.
How can I fix out-of-focus photos in post-processing?
This query delves into post-processing techniques for improving focus and sharpness in photos that didn’t turn out as expected.
What are the best practices for focusing in low-light conditions with a DSLR camera?
Low-light photography often presents focusing challenges, and users seek guidance on how to achieve sharp focus in such conditions.