How to Take a Photo: Picture Perfect in 14 Steps
Hey there Shutterbug, just wanted to let you know that some of the links on this site may be Amazon Affiliate or affiliate links,. which means I may earn a small commission if you make a purchase after clicking on them. But don't worry, it won't cost you any extra – in fact, sometimes you may even get a special discount! So if you do decide to buy something through my links, know that you'll be supporting my work and helping me bring more helpful content your way. Thank you for your support, you're like a superhero to my work! I couldn't do it without you, unless I suddenly develop the ability to clone myself...which, honestly, would be pretty cool.
Imagine standing at the edge of a breathtaking sunset, desperate to capture its beauty in a photo. I’ll show you where to start with how to take a photo that does justice to such moments.
Are you ready to unlock the secrets of capturing your first photographs? In this comprehensive guide, I’ll walk you through the process of how to take a photo with confidence and the know-how to tweak the photo in post-production. Whether you’re a beginner or looking to refine your skills, I’ve got your basics covered. Get ready to embark on a visual journey filled with knowledge bombs and unforgettable tips. Let’s dive in and discover the art of capturing your first shots.
Things to Consider Before Taking Your First Photos
Photography can sometimes feel like a foreign language with all those fancy terms. But fear not, I’m here to demystify it for you! Let’s start with the basics so you can confidently navigate your camera’s settings and take stunning shots. Here are a few key terms you should know:
Understand the Terms
Aperture
Think of the aperture as the pupil of your camera’s eye. It controls the amount of light entering the lens. A wider aperture (represented by a lower number like f/1.8) lets in more light and creates a beautifully blurry background effect, perfect for portraits. On the other hand, a smaller aperture (higher number like f/16) increases the depth of field, keeping everything in focus for landscape shots.
Shutter Speed
Imagine your camera’s shutter as a curtain that opens and closes to expose the image sensor. Shutter speed determines how long that curtain stays open. A fast shutter speed (1/1000s or higher) freezes action, ideal for sports photography. On the flip side, a slow shutter speed (1/30s or slower) can create dreamy motion blur in subjects like flowing water or night sky.
Viewfinder
Ah, the trusty viewfinder! It’s like looking through a tiny magical window that shows you exactly what your camera sees. Use it to frame your shot, adjust composition, and ensure your subject is in focus. Take a moment to get familiar with peering through it and framing your world.
Flash
The infamous flash! While it can be handy in low-light situations, it’s not always the superhero we expect. Don’t be afraid to experiment with natural lighting and avoid that deer-in-headlights look. However, when you do need to use the flash, consider diffusing it or bouncing it off a nearby surface for a softer, more flattering light.
Focusing
Getting your subject in sharp focus is key to capturing a killer photo. Most cameras offer autofocus, where the camera does the work for you. But don’t be afraid to take control and use manual focus when needed. Remember, sharp eyes make for captivating portraits, so give that focus ring a whirl!
ISO (Sensor Sensitivity)
ISO measures the sensitivity of your camera’s image sensor to light. A lower ISO (e.g., 100) works best in bright conditions, producing crisp and noise-free images. In darker environments, you can crank up the ISO (e.g., 800 or higher), but keep in mind that higher ISOs may introduce grain or noise to your photos.
8 Types of Photography
With a solid grasp of these fundamental photography terms, you’re equipped to explore the exciting world of different photography genres. From breathtaking landscapes to captivating portraits and everything in between, I’ll guide you through various types of photography, helping you discover your passion and unleash your creative vision. Let’s dive in and embark on an unforgettable journey through the lens!
Landscape
Immerse yourself in the beauty of nature as you capture sweeping vistas, majestic mountains, and serene sunsets, creating stunning compositions that transport viewers to breathtaking destinations.
Street or Moment
Step into the vibrant rhythm of everyday life, seizing spontaneous moments and candid interactions on bustling streets, documenting the essence of cultures and the stories unfolding around you.
Sports/Action
Freeze the adrenaline-fueled moments of intense action, capturing athletes in their peak performance, as you skillfully track movement, showcase the thrill, and convey the energy of the game.
Close-up or macro
Explore the mesmerizing world of intricate details, revealing the hidden beauty of small subjects as you capture the delicate intricacies, textures, and patterns that often go unnoticed by the naked eye.
Nature
Venture into the great outdoors, celebrating the wonders of wildlife, flora, and natural landscapes, immortalizing the harmony and raw beauty of Mother Nature in all its awe-inspiring glory.
Fashion
Unleash your creativity and delve into the glamorous world of fashion photography, capturing striking poses, and exquisite outfits, and evoking emotion to create captivating images that embody style and sophistication.
Architecture
Discover the artistry in the structural marvels around us, capturing the lines, curves, and symmetry of buildings, bridges, and urban landscapes, showcasing the grandeur and ingenuity of human creations.
Portrait
Connect with the essence of individuals, immortalizing their personalities, emotions, and unique stories through compelling portraiture, capturing the depth and beauty that lies within each subject.
Still Life
Curate captivating scenes and meticulously arrange objects, capturing the beauty in the ordinary, as you create artful compositions that breathe life into everyday objects, telling stories through arrangement, light, and texture.
Astrophotography
Turn your lens towards the heavens, capturing the mesmerizing wonders of the night sky, from celestial bodies and star trails to awe-inspiring nebulas, transporting viewers to the depths of the universe through your lens.
Now that you have glimpsed the vast array of photography genres, it’s important to note that there are even more avenues waiting to be explored. In the upcoming sections, I will not only dive into the essential steps of how to take a photo, including camera preparation and post-processing, but I will also touch upon practice ideas to fuel your creativity. So, grab your camera, prepare to unleash your artistic vision, and let’s dive into the exciting world of photography together!
How to Take a Photo: Pre-Shoot to Post Shoot
Pre-Photo Checklist:
- Make sure your camera battery is charged and inserted into the camera, ready to capture amazing moments.
- Ensure that the memory card is securely inserted into the camera, providing ample space to store your photographic adventures.
- For these initial photos, it’s recommended to use either a versatile kit lens like the 18-55mm or a fantastic 50mm prime lens to capture stunning images.
- Double-check that you have a suitable connection method, whether it’s a cable to link your camera to the computer or a trusty card reader for easy photo transfer.
- Decide on the editing program you’d like to use, and if you’re looking for a suggestion, Adobe Lightroom* is an excellent choice (stay tuned for future articles discussing other options).
- Create a dedicated folder on your computer to keep all your precious photos organized and easily accessible (more on this in an upcoming article about photo organization).
*Adobe Lightroom serves as our creative partner, helping us unlock the full potential of our photos, from importing and editing to the final exporting stage. While there are other programs available, Lightroom streamlines the entire process, making it simpler for us to enhance our photos. Remember, the principles I discuss will apply to other programs as well, even if they may differ in features. So, don’t worry if you’re using a different program—you’ll still find valuable insights and techniques in our articles that can be adapted to your workflow.
Step 1. Choose Auto Mode:
Imagine your camera as a super-smart robot friend who knows all about taking great pictures. For now, I’ll keep things super easy and let the camera do all the work for us! This can be done by the dial on top of your camera, if your model varies check with your user manual.
Step 2. Decide Your Capture Resolution JPEG vs RAW:
Just like choosing between a ready-made pizza or making one from scratch, your camera can save photos in different ways. I’ll start with the ready-made option called JPEG, but don’t worry, we’ll learn more about the homemade version called RAW later! This is done in the setting menu on the camera, again if you are unsure where to find this look at your user manual.
Step 3. Find Your Subject:
Look around and find something that catches your attention, like your favourite superhero action figure or a beautiful flower in the garden. Choose something that makes you say, “Wow, that looks cool!”
Step 4. Frame Your Shot:
Pretend your camera is a magic picture frame, and you’re the artist who gets to decide what goes inside. Move around and experiment with different angles until your subject fits perfectly in the frame, just like putting puzzle pieces together.
Step 5. Steady Your Hand:
Hold your camera firmly with both hands, like you’re about to take a picture of your best friend. Keep it still, just like when you’re playing Operation and you need a steady hand to remove the tiny bones. A tip is to plant your feet firmly on the ground and tuck your elbows into your side.
Step 6. Focus on Your Subject:
Your camera has super eyes that can focus on what you want to take a picture of, just like a detective zooming in on clues. Simply point your camera at your subject, press the button halfway, and let the camera do the rest!
Step 7. Capture the Moment:
Now it’s time to press the button all the way down, just like high-fiving your best buddy. Your camera will capture the magical moment, freezing it forever, just like a time machine!
Step 8. Transfer Photos to the Computer:
There are a couple of ways to transfer your photos from the camera to your computer, just like getting your toys to come to life! The first way is to connect your camera to the computer using a special cable, just like when you connect your game controller to play your favourite video game. The second way is to take out the memory card from the camera and insert it into a card reader that’s like a mini-computer for your photos. This magical process will bring your awesome pictures to life on the big screen, just like a movie premiere!
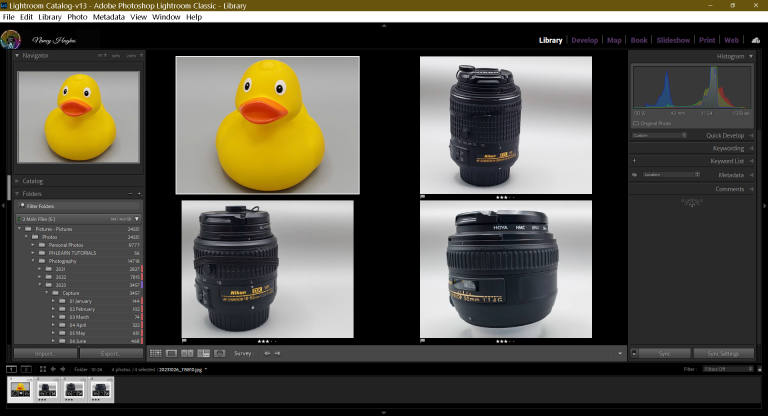
Step 9. Select the Best Images:
Be the director of your incredible photo collection, handpicking the pictures that make you exclaim, “Wow, that’s absolutely amazing!” Trust your instincts and select the ones that bring you the most joy, just like choosing your favourite flavour of ice cream from a delightful array of options. To accomplish this, you can use special markers like flags, stars, or colours in Adobe Lightroom or any other editing program of your choice, adding a touch of magic to your photo organization process.
Step 10. Adjust Images:
If your photos need a little extra pizzazz, don’t worry! We can sprinkle some magic on them using special computer programs like Adobe Lightroom. Don’t worry, we will start with the basics of this in a little bit.
Step 11. Add Keywords, Captions and Copyright Information
Imagine you’re playing a super fun game with your photos! To make it even more exciting, you can add special words called keywords to help you find your pictures easily later on. It’s like giving your photos secret codes! You can also write funny captions for your photos, just like the words you put on funny memes. It makes your pictures even more awesome!
And remember, it’s important to protect your creative work. By including copyright information, you let everyone know that the photos belong to you. It’s like writing your name on a masterpiece you created! You can add copyright information in Adobe Lightroom too. So get ready to show off your creativity, add captions, and keep your photos safe with copyright information in Adobe Lightroom’s Library module, under the Metadata section.
Step 12. Save the Image:
Imagine you have a super cool drawing that you want to keep safe and show to your friends later. Just like that, when you’re done editing your photo in Adobe Lightroom, you can save it on your computer in a special folder. You can even give it a special name, like “My Awesome Adventure” or anything you like! The best part is, if you’re using Adobe Lightroom, all the changes you made to your photo will be automatically saved, so you don’t have to worry about losing your awesome edits. It’s like having a magical photo-saving power right at your fingertips!
Warning: If you’re using a program other than Lightroom, be aware that some editing software can be destructive, meaning it permanently alters your original file. To safeguard your photos and preserve the ability to make future edits, it’s essential to use the “Save As” option when working outside of Adobe Lightroom. This allows you to create a separate copy of your image, protecting the original file while giving you the freedom to make new edits for years to come. So remember, always prioritize the safety of your photos by using “Save As” and enjoy peace of mind knowing your precious images are protected.
Step 13. Export
Ready to show off your awesome photos to everyone? In Adobe Lightroom, it’s super-duper easy! Just click a special button called “Export,” choose how you want your pictures to look, and ta-da! They magically turn into special files that you can easily share with your friends and family. It’s like giving your photos wings to fly and impress everyone with your amazing picture-taking skills. Get ready to amaze the world with your fantastic creations!
Step 14. Backup Your Images:
Superheroes always have a backup plan, and your photos are no different! Make copies of your precious pictures and store them in another safe place, like a magical cloud or a special USB drive, so they’re always protected.
Great job! You’ve learned how to take photos in auto mode. In our future blogs, we’ll explore more exciting camera modes and dive deeper into using Lightroom to enhance your photos even further.
Remember, photography is all about practice and having fun! Don’t be discouraged if your first few shots don’t turn out exactly as you envisioned. Keep experimenting, exploring different subjects, and learning from your experiences. Before you know it, you’ll be capturing amazing photos and creating memories that will last a lifetime. So, grab your camera, let your creativity soar, and enjoy the journey of capturing incredible moments through the lens!
Practise & Evaluate
Welcome to the fun part where you get to practice and evaluate your amazing photography skills! It’s time to put all the knowledge we’ve learned into action. Grab your camera and let’s dive into exciting challenges and creative experiments.
Practise Ideas
Street or Moment
When it comes to capturing street or moment shots, patience is key. Keep an eye out for interesting scenes that catch your attention, like a vibrant street market bustling with people or a street performer showing off their skills. Remember, light can transform a scene, so be mindful of how it plays with shadows and creates different moods throughout the day. Take your time, observe your surroundings, and let your creativity flow as you capture those amazing moments that make your photos truly special.
Candid Portrait
Capturing candid portraits is all about being discreet and spontaneous. Instead of asking your subject to pose, try to blend into the background like a ninja photographer and capture their genuine expressions and emotions in their natural environment. Look for those candid moments that tell a story, whether it’s a friend laughing at a joke or a stranger lost in thought. Remember, the magic happens when you capture people in their most authentic and unguarded moments. So, grab your camera, keep your finger on the shutter button, and be ready to seize those candid portrait opportunities that unfold before your eyes.
Head and Shoulders Portrait
When taking head and shoulder portraits, it’s all about focusing on the person’s face and capturing their unique personality. Find a well-lit area where their face is the main focal point, like near a window or in an open shade. Encourage them to relax and show their true selves, whether it’s a genuine smile or a serious expression. Remember, it’s the eyes that tell the story, so make sure they shine with clarity and emotion. Just like capturing a glimpse of someone’s soul, these head and shoulder portraits will bring out the essence of your subject and create beautiful memories.
Landscape
To capture beautiful landscape photos, start by finding a stunning scene that catches your eye, such as a picturesque mountain range or a tranquil beach. Remember the rule of thirds, which means placing the horizon on the top or bottom third of the frame to create a balanced composition. Don’t be afraid to explore the location early and walk around to find the best angle that highlights the landscape’s unique features. Embrace the golden hours of sunrise or sunset when the light bathes the scene in warm hues, adding a touch of magic to your photos.
Still Life
To create captivating still-life photos using everyday objects, start by selecting interesting items like fruits, flowers, or household items with unique shapes or textures. Experiment with different angles, such as shooting from above or getting close to capture intricate details. Observe how the angles you choose can transform the image, highlighting different aspects and creating a sense of depth. Remember to play with lighting and shadows to add dimension to your still-life compositions. So, unleash your creativity, explore the beauty of everyday objects, and let your camera capture the artistry in the ordinary.
Action
Looking to hone your action photography skills? Try practicing with dynamic sports like soccer or a race track. Set your camera to a wide-angle lens and position yourself near the action. Each time the players or racers come into your frame, take a shot and aim to capture as much of the action as possible. It’s all about timing and anticipating those thrilling moments. So keep practicing, and soon you’ll be capturing the excitement of sports like a pro!
Review and Evaluate Your First Photos
Ready to evaluate your awesome photos? Here’s a simple checklist to help you determine if your shots are on point:
✔️ Good Composition
Did you frame your landscape shot using the rule of thirds, with the horizon placed on the top or bottom third? For example, a stunning sunset over the beach with the horizon aligned on the lower third.
✔️ Sharp Where it Should Be
Are the details crisp and focused in the areas that matter most? For instance, in a close-up photo of a flower, are the petals sharp and the center in clear focus?
✔️ Eyes
In a portrait shot, are the subject’s eyes bright, vibrant, and full of life, drawing you into the image?
✔️ Back to front
Does your photo have a sense of depth? For instance, in a still-life composition of a table setting, are the objects arranged in layers, with the foreground, middle ground, and background clearly defined?
✔️ Action frozen
Have you successfully captured a decisive moment in a sports event, such as a basketball player mid-jump for a slam dunk or a race car zooming past the finish line?
✔️ Exposed Properly
Is your photo correctly exposed, with the right balance of light and shadow? In a landscape shot, are the highlights and shadows well-managed, showcasing the beauty of the scenery?
✔️ Worked with Light Well
Did you make the most of natural light, like early morning or late afternoon sunlight, to enhance the mood and atmosphere of your photo? For example, a portrait shot with soft, flattering light falling on the subject’s face.
✔️ Are there Distractions?
Check for any elements that may divert attention away from the main subject. For example, in a still-life photo of a vase of flowers, ensure there are no distracting objects in the background.
Keep this checklist as your trusty companion on your photography journey, guiding you to improve your skills and capture incredible shots that tell your unique visual stories. Remember, if some of the terms or concepts mentioned here aren’t crystal clear yet, don’t fret! We’ll delve deeper into them in future blogs, unveiling the secrets to capturing truly stunning photos. So keep practicing, stay curious, and most importantly, have fun along the way!
Post Processing

Have you ever noticed how your phone automatically makes your photos look better? It’s like having a mini editing wizard right in your pocket! But here’s the exciting part: by learning how to edit your photos yourself, you become the master of your artistic destiny. You can take control of the colours, brightness, and overall mood of your images. It’s like having superpowers to transform ordinary snapshots into extraordinary works of art. So, let’s dive into the world of editing and begin to unlock the full potential of your photos!
Don’t worry if some things seem a bit confusing or overwhelming at first. Even the most experienced photographers had to start somewhere, and it’s completely normal to feel a bit lost. I’m a big fan of using Google to find answers when I’m exploring new tools like Lightroom. If you accidentally make a panel disappear (and trust me, it happens to the best of us), don’t panic! Google can come to the rescue and show you how to bring it back. I’ll also be creating future blogs to cover these topics in more detail, so stick with me on this journey. And remember, if you ever need a helping hand, don’t hesitate to reach out—I’m here to help you navigate the wonderful world of photography!
Asses Photo
Let’s start by taking a good look at the photo you want to edit. Think of it as examining your masterpiece with a detective’s eye. Is the horizon a little wonky? Are the colours feeling a bit dull? Is the sky missing that wow factor? Don’t worry, we’ll fix all of that! We’ll straighten out the horizon, add a pop of vibrant colours, and make sure the sky is full of drama and contrast. And if there are any unwanted elements in the frame, we’ll crop them out to focus on what really matters. It’s like giving your photo a little makeover to make it shine and stand out wherever you decide to share it!
Auto Exposure
To edit your photo in Lightroom’s Develop module, press ‘D’ on your keyboard to get started. In the Basic section on the right-hand side, you’ll see an eyedropper tool and a drop-down menu with options like auto, daylight, and cloudy. Choose auto for a quick colour adjustment. If the photo still needs fine-tuning, use the eyedropper tool to click on a gray area of the image to fix the white balance. Now, let’s take it up a notch! Click the auto button under the tone section, located to the right of the exposure setting. This will apply AI-powered edits to balance the colours, shadows, and highlights. Want to try different styles? Check out the Presets panel on the left-hand side, where you’ll find pre-defined editing styles created by others. Have fun experimenting and finding your favourite look!
Saturation
Now, let’s talk about the Saturation slider in the Basic section on the right-hand side. It’s like a magic wand for the colours in your photo! You can slide it back and forth to see how it brightens or tones down the colours. But remember, too much saturation can make things look unreal, like a cartoon. So, find that sweet spot where the colours pop just enough without going overboard. Don’t worry about the other sliders for now; I’ll dive deeper into them later. For now, let’s focus on the basics and make those colours shine!
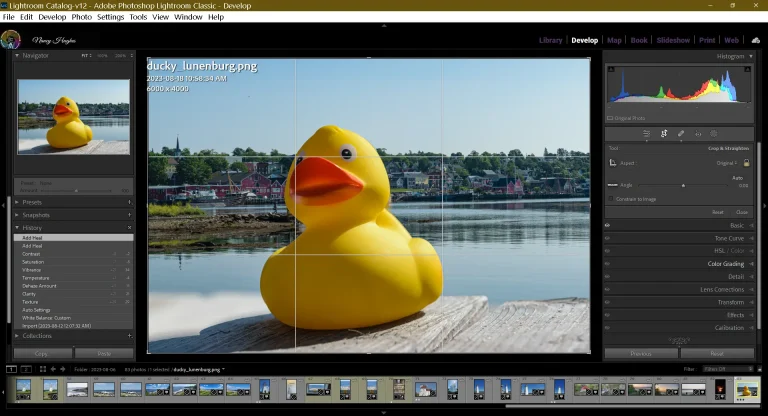
Straighten
Now, let’s move on to the second-to-last adjustment: cropping and straightening. To access this panel, simply hit the ‘R’ key on your keyboard. Once you’re there, you can click on the “Auto” button, and in most cases, it will straighten the photo for you if it’s needed. Sometimes, though, you might need to use your mouse to manually rotate the image. To do this, place your mouse outside the white lines, and you’ll see a curved arrow appear. You can then rotate the photo to get it nice and straight. Just remember, the more crooked the picture is, the more you’ll end up cropping out, so it’s best to try and keep it as straight as possible when you’re taking the photo. That way, you’ll have fewer adjustments to make afterward.
Crop
Lastly, let’s talk about the aspect ratio in the same panel. You’ll notice a drop-down menu with various options, such as 1:1 (square, like Instagram), 16:9 (popular for landscapes and wide angles), and 2:3 (ideal for printing 4×6 photos). You can also choose “Custom” if you have a specific aspect ratio requirement, like a Facebook profile cover or other unique dimensions. The white lines you see on the photo should default to the rule of thirds, which can guide you in positioning the horizon on one of the lines or placing subjects in the designated columns. Once you’re satisfied with the crop, simply hit the Enter key on your keyboard to exit the tool and finalize your changes.

Save
Now, let’s get back to your photo library by hitting the ‘G’ key on your keyboard. From there, you can proceed to export your edited photo. Don’t worry if you see a lot of settings, we’ll keep it simple for now. Choose the location where you want to save your exported photo and give it a name. If you’re using your photo on a computer, you can select “Sharpen for” and choose “Screen” as the option. The amount of sharpening is up to you, depending on how much detail you want to enhance. Next, you can choose the amount of metadata to include. For basic protection, I usually pick “Copyright only.” However, if you want others to see captions and keywords, you can choose a different option. Whether or not to add a watermark is entirely up to you. This will imprint your name or any chosen words on your photo, making it immediately recognizable as yours. It’s a personal preference, so feel free to experiment with it. Finally, click the “Export” button, and voila! Your photo is ready to be retrieved, printed, or shared with the world.
Bonus: Area-Specific Edits
AI technology is always advancing, and Lightroom keeps evolving to make editing easier for us. In the presets section on the left-hand side, under the develop module, you’ll find adaptive presets for specific subjects like portraits, skies, and more. These presets automatically analyze different parts of your photo and apply adjustments accordingly. You can explore the options available and see which ones you like, as they are popular choices among photographers. However, it’s important to note that presets may not work perfectly in every situation. They serve as a starting point for more precise editing before we delve into manual adjustments. Just like how I relied on presets and auto mode for a long time when I started, it’s okay to use them to get a feel for editing. But fear not! We’ll soon venture into manual mode and explore techniques that will allow you to add your personal touch to your photos. So, enjoy experimenting with presets for now, and we’ll gradually unlock more creative possibilities together!
Conclusion
In conclusion, I’ve covered some key photography concepts in this blog post. We learned about the importance of composition, capturing sharp images, focusing on the eyes, freezing action, proper exposure, working with light, and minimizing distractions in your photos. By keeping these aspects in mind, you can improve the quality and impact of your images.
Remember, photography is a journey, and the more you practice, the better you’ll become. Keep experimenting, trying out different genres, and pushing your creative boundaries. Each photo you take is an opportunity to learn and grow as a photographer.
To further enhance your skills, there are many resources available for learning. Photography websites, like Digital Photography School or PetaPixel, offer a wealth of articles, tutorials, and inspiration. Books such as “Complete Guide to Digital Photography” by Ian Farrell or “Adobe Photoshop Lightroom Classic: Classroom in a Book” by Concepcion delve deeper into the art and technique of photography and how to find your way around Adobe Lightroom.
So, keep exploring, stay curious, and enjoy the process of capturing stunning photos that tell your unique visual stories. Remember, if some of the concepts or techniques we discussed in this blog post don’t make complete sense yet, don’t worry! We’ll dive deeper into them in future blogs, helping you unlock the secrets of capturing amazing photographs. Feel free to reach out to me if you have any questions or need further assistance. Happy shooting!
Practise, Practise, Practise
Exciting news! Every second week, I’ll be hosting a condensed version of the latest lesson, packed with practical tips and techniques to help you improve your photography skills. But that’s not all! A few days later, I’ll also be hosting a photo challenge where you can put your newly acquired skills to the test and see how others are doing too.
To stay in the loop and ensure you don’t miss out on any of these exciting opportunities, I encourage you to join our Facebook group. It’s a vibrant community of fellow photography enthusiasts where you can share your progress, ask questions, and get inspired by others. It’s a great way to stay connected, learn from one another, and fuel your passion for photography.
So don’t miss a thing! Join our Facebook group today and get ready to take your photography journey to the next level. See you there!
If this helped you please share it with your friends. If you want more content delivered to you directly sign up for the newsletter and comment below if you have any questions or comments.
F.A.Q
How do I take a photo with my phone?
To take a photo with your phone, open the camera app, frame your subject, and tap the shutter button. Experiment with different compositions, lighting, and angles to capture stunning shots. Remember, practice makes perfect!
How do you take pictures step by step?
Capture amazing pictures step by step: 1) Choose a subject that interests you. 2) Frame your shot by adjusting the composition. 3) Adjust settings like exposure and focus. 4) Click the shutter button to capture the moment. 5) Review and edit your photos for that extra touch. Start snapping and unleash your creativity!
How do I take a photo with my PC?
Capturing photos with your PC is easy! Just connect a webcam or use the built-in camera, open the camera app, frame your shot, and click the capture button. Explore different angles and lighting to unleash your creativity. Happy clicking!
How do beginners take pictures?
Beginners can start taking great pictures by keeping it simple: choose auto mode on your camera, find interesting subjects, frame your shot, and press the shutter button. Practice, experiment, and have fun! Remember, every click is a step towards becoming a skilled photographer.